Friday, February 3, 2023

How to Program a Shotgun Blast Effect Using Threejs in a 3D Game


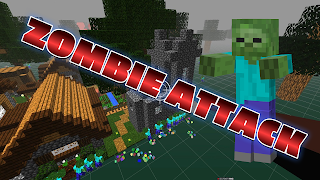
This code is a part of a 3D zombie attack game and implements a shotgun blast effect using the Three.js library. It was developed by Shane Brumback with 3D Interactive. Instead of using a particle system, this solution uses spheres to simulate the spread of the shot.


The fireShotGunSpheres() function generates 20 spheres and adds them to the scene. The sphere's position is set relative to the camera's position, so that the spheres appear always in front of the camera. Each sphere has a SphereGeometry of 0.05 units and a MeshBasicMaterial of yellow color. The spheres are added to an array called shotGunSpheres.

<!--////////////////////////////////////////////////////////////////////////////////////////
/// ///
/// Example Using Three.js Library, HTML & Javascript ///
/// Developer 3D Interactive 3D Games and Apps 2021-2023 ///
/// Contact Shane Brumback https://www.shanebrumback.com ///
/// Send a message if you have questions about this project ///
/// Subscribe to my YouTube Channel ///
/// https://www.youtube.com/channel/UC5kqNYlnPWrL46eTKjTEPHg ///
/// Find More Example Code on Shane Brumback's Tech Blog ///
/// https://shanebrumback.blogspot.com/ ///
/// ///
////////////////////////////////////////////////////////////////////////////////////////////-->
function fireShotGunSpheres() {
// Loop 20 times to create 20 spheres
for (var i = 0; i < 20; i++) {
// Create a sphere geometry with a radius of 0.05 units and 32 segments on each axis
var sphere = new THREE.SphereGeometry(.05, 32, 32);
// Create a basic mesh material with a yellow color
var material = new THREE.MeshBasicMaterial({ color: 0xffff00 });
// Combine the sphere geometry and material to create a mesh
var sphereMesh = new THREE.Mesh(sphere, material);
// Set the sphere position to a random position within a 0.5 unit cube area relative to the shotgun object position
sphereMesh.position.x = camera.position.x + (Math.random() * 0.5 - 0.25);
sphereMesh.position.y = camera.position.y + (Math.random() * 0.5 - 0.25) - 1;
sphereMesh.position.z = camera.position.z + (Math.random() * 0.5 - 0.25);
// Add the sphere to the scene
scene.add(sphereMesh);
// Add the sphere to the shotGunSpheres array
shotGunSpheres.push(sphereMesh);
}
}
function animateShotGunParticles() {
// Loop through each sphere in the shotGunSpheres array
for (var i = 0; i < shotGunSpheres.length; i++) {
// Get the current sphere
var sphere = shotGunSpheres[i];
// Copy the rotation of the camera to the sphere
sphere.rotation.copy(camera.rotation)
// Calculate the distance between the sphere and the starting position
var distance = sphere.position.distanceTo(shotgunObject.position);
// If the distance is less than 10 units, move the sphere in a random direction on the x and y axis and down the -z axis
if (distance < 10) {
sphere.translateX(Math.random() * 2 - 1);
sphere.translateY(Math.random() * 2 - 1);
sphere.translateZ(-3);
}
// If the distance is less than 1 unit, hide the sphere
if (distance < 1) {
sphere.visible = false;
}
// If the distance is greater than 1 unit, show the sphere
if (distance > 1) {
sphere.visible = true;
}
// If the distance is greater than or equal to 10 units, remove the sphere from the scene and splice it from the shotGunSpheres array
if (distance >= 10) {
scene.remove(sphere);
shotGunSpheres.splice(i, 1);
}
}
}


The animateShotGunParticles() function animates the spheres by looping through each sphere in the shotGunSpheres array, calculating the distance between the sphere and the starting position (the position of the shotgun object), and translating the sphere accordingly. If the distance is less than 10 units, the sphere is moved in a random direction on the x and y axis and down the -z axis. If the distance is less than 1 unit, the sphere is set to be invisible. If the distance is greater than or equal to 10 units, the sphere is removed from the scene and spliced from the shotGunSpheres array.

This code can be modified to suit the desired look for the shotgun blast effect. For example, the size and number of spheres, the distance the spheres move, and the color of the spheres can be changed to achieve a different look.


Tuesday, January 31, 2023

How to Program a Three.js Laser Ring for a 3D Game


Three.js is a powerful JavaScript library that makes it easy to create 3D graphics in the browser. In this article, we will be covering how to create a program for 3D laser rings in a game using the Three.js library. Whether you're a seasoned game developer or just starting out, this guide will walk you through the steps of programming a laser ring in Three.js.

First, we'll start by setting up our Three.js scene. This includes setting up the camera, renderer, and scene variables. We'll also add the OrbitControls library to the scene, which will give us the ability to control the camera and move around the laser ring. Additionally, we'll add a grid helper to the scene, which will serve as a background to the laser ring.

Next, we'll create a spotlight with shadows, which will be used to light up the laser ring. We'll position the spotlight and add it to the scene


The next step is to create the laser ring. We'll start by defining the geometry and material of the ring. The geometry will consist of a torus with a radius of 0.5 and a tube of 0.05. The material will be a basic mesh material with a yellow color. After that, we'll position the laser ring in the center of the scene and add it to the scene.

Finally, we'll set up an animation function that will animate the laser ring. This function will scale the ring, move it along the Z-axis, and render the scene using the camera and renderer. If the laser ring moves past a certain point along the Z-axis, it will be reset to its original position and scale.

And that's it! You now have a 3D laser ring program in Three.js that you can use in your game. With a few tweaks, you can make this program as complex or as simple as you need it to be. The possibilities are endless!

In conclusion, Three.js is a fantastic tool for creating 3D graphics in the browser. With its simple API, it's easy to get started creating 3D laser rings in your game. Whether you're a beginner or an experienced game developer, the Three.js library is a great choice for your next project.

Saturday, January 28, 2023

How to Program a Three.js Comet Particle System with HTML and Javascript


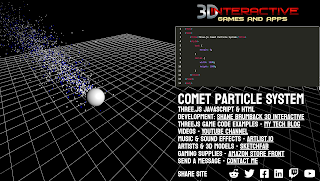
In this article, we will explore how to create a comet effect in a 3D game using the Three.js particle system. Three.js is a JavaScript library that allows you to create and display 3D graphics in a web browser. The particle system in Three.js allows you to create a large number of small, individual particles that can be used to create interesting effects such as comets, explosions, and more.

How to Program a Three.js Comet Particle System


First, we define global variables that will be used throughout the code, including a scene, camera, renderer, and an array to hold the spheres. We then set up the Three.js scene and the camera, positioning it so that it is looking at the scene from the correct angle. We also set up the renderer and append it to the DOM so that it can be displayed on the screen.

Next, we set up the orbital controls, which allow the camera to rotate smoothly around the spheres. We also create a grid helper and add it to the scene, as well as a spotlight that will be used to illuminate the scene.


<!--////////////////////////////////////////////////////////////////////////////////////////
/// ///
/// Example Using Three.js Library, HTML, CSS & JavaScript ///
// 3D Interactive Web Apps & Games 2021-2024 ///
/// Contact Shane Brumback https://www.shanebrumback.com ///
/// Send a message if you have questions about this code ///
/// I am a freelance developer. I develop any and all web. ///
/// Apps Websites 3D 2D CMS Systems etc. Contact me anytime :) ///
/// ///
////////////////////////////////////////////////////////////////////////////////////////////-->
<!DOCTYPE html>
<html lang="en">
<head>
<meta charset="UTF-8">
<meta name="viewport" content="width=device-width, initial-scale=1.0">
<title>Three.js Examples - Comet Tail Particle System</title>
<style>
body {
color: white;
text-align: center;
margin: 0;
background-color: black
}
a {
text-decoration: none;
color: white;
}
h1 {
padding: 10px;
}
</style>
</head>
<body>
<a href="http://www.shanebrumback.com/threejs-examples/comet-particle-system.html">
<h1>Three.js Examples - Comet Tail Particle System</h1>
</a>
<!--Load the latest Version of Three.js from CDN-->
<script src="https://cdn.jsdelivr.net/npm/three@latest/build/three.min.js"></script>
<script src="https://cdn.jsdelivr.net/npm/three@latest/examples/js/controls/OrbitControls.js"></script>
<script type="module">
function init() {
// Define global variables
let scene, camera;
// Set up Three.js scene
scene = new THREE.Scene();
// Set up the camera
camera = new THREE.PerspectiveCamera(75, window.innerWidth / window.innerHeight, 0.1, 1000);
camera.position.x = 20;
camera.position.z = 20;
camera.position.y = 5;
// Set up the renderer and configure settings
let renderer = new THREE.WebGLRenderer({ antialias: true, alpha: true });
renderer.setPixelRatio(window.devicePixelRatio);
renderer.setSize(window.innerWidth, window.innerHeight);
renderer.toneMapping = THREE.ReinhardToneMapping;
renderer.setClearColor(0x000000); // Set background color to black
renderer.domElement.style.position = 'fixed';
renderer.domElement.style.zIndex = '-1';
renderer.domElement.style.left = '0';
renderer.domElement.style.top = '0';
document.body.appendChild(renderer.domElement);
camera.aspect = window.innerWidth / window.innerHeight;
camera.updateProjectionMatrix();
scene.scale.normalize().multiplyScalar(1);
// Create the ambient light
const ambientLight = new THREE.AmbientLight(0xffffff, 10); // Parameters: color, intensity
scene.add(ambientLight);
// Set up the orbital controls
const controls = new THREE.OrbitControls(camera, renderer.domElement);
controls.dampingFactor = 0.1; // Reduce camera damping for smoother movement
controls.autoRotate = true; // Make the camera rotate sinuously around the spheres
window.addEventListener('resize', onWindowResize);
function onWindowResize() {
// Update camera aspect ratio and renderer size on window resize
camera.aspect = window.innerWidth / window.innerHeight;
camera.updateProjectionMatrix();
renderer.setSize(window.innerWidth, window.innerHeight);
}
// Create a grid helper
var grid = new THREE.GridHelper(100, 40);
scene.add(grid);
// Create the spotlight with shadows
const spotLight = new THREE.SpotLight(0xffffff);
spotLight.position.set(10, 20, 30);
spotLight.castShadow = true;
scene.add(spotLight);
// Create the sphere
let sphereGeometry = new THREE.SphereGeometry(1.5, 32, 32);
let sphereMaterial = new THREE.MeshPhongMaterial({ color: 'white' });
let sphere = new THREE.Mesh(sphereGeometry, sphereMaterial);
// Create the particle system
const particleCount = 2500;
let sphereRadius = 1;
const particleGeometry = new THREE.BufferGeometry();
const particlePositions = new Float32Array(particleCount * 3);
const particleColors = new Float32Array(particleCount * 3);
for (let i = 0; i < particleCount; i++) {
// Generate random values within the sphere-shaped area
const r = sphereRadius * Math.sqrt(Math.random());
const theta = Math.random() * Math.PI * 2;
const phi = Math.acos(2 * Math.random() - 1);
// Convert from spherical to Cartesian coordinates
const x = r * Math.sin(phi) * Math.cos(theta);
const y = r * Math.sin(phi) * Math.sin(theta);
const z = r * Math.cos(phi);
// Set the positions and colors for each particle
particlePositions[i * 3] = x;
particlePositions[i * 3 + 1] = y;
particlePositions[i * 3 + 2] = z;
particleColors[i * 3] = 1.0;
particleColors[i * 3 + 1] = 0.5;
particleColors[i * 3 + 2] = 0.2;
}
// Add the position and color attributes to the geometry
particleGeometry.setAttribute('position', new THREE.BufferAttribute(particlePositions, 3));
particleGeometry.setAttribute('color', new THREE.BufferAttribute(particleColors, 3));
// Create the particle material and system
const particleMaterial = new THREE.PointsMaterial({ size: .10, vertexColors: THREE.VertexColors });
const particleSystem = new THREE.Points(particleGeometry, particleMaterial);
// Create a group to hold the particle system and sphere
let cometGroup = new THREE.Group();
cometGroup.add(particleSystem);
cometGroup.add(sphere);
scene.add(cometGroup);
const animate = function () {
requestAnimationFrame(animate);
for (let i = 0; i < particleCount; i++) {
// Move the particles down the -z axis
particlePositions[i * 3 + 2] -= 0.4;
// Randomly move some particles out a greater distance from the center
if (Math.random() < 0.009) {
particlePositions[i * 3] += (Math.random() * 2 - 1) * sphereRadius * 4;
particlePositions[i * 3 + 1] += (Math.random() * 2 - 1) * sphereRadius * 4;
}
if (particlePositions[i * 3 + 2] < -25) {
// Randomly reset some of the particles back to the sphere area
if (Math.random() < 0.01) {
particlePositions[i * 3] = (Math.random() * 1.5 - .75) * sphereRadius * 1.5;
particlePositions[i * 3 + 1] = (Math.random() * 1.5 - .75) * sphereRadius * 1.5;
particlePositions[i * 3 + 2] = (Math.random() * 1.5 - .75) * sphereRadius * 1.5;
}
}
// Check if the particles should move randomly or not
if (Math.random() < 0.05) {
// Move the particles randomly within the larger sphere area
particlePositions[i * 3] += (Math.random() * 2 - 1) * sphereRadius * 2;
particlePositions[i * 3 + 1] += (Math.random() * 2 - 1) * sphereRadius * 2;
particlePositions[i * 3 + 2] += (Math.random() * 2 - 1) * sphereRadius * 2;
}
// Update particle colors based on position
if (Math.sqrt(particlePositions[i * 3] * particlePositions[i * 3] + particlePositions[i * 3 + 1] * particlePositions[i * 3 + 1] + particlePositions[i * 3 + 2] * particlePositions[i * 3 + 2]) < sphereRadius) {
particleColors[i * 3] = 1.0;
particleColors[i * 3 + 1] = 1.0;
particleColors[i * 3 + 2] = 1.0;
} else {
particleColors[i * 3] = 0.0;
particleColors[i * 3 + 1] = 0.0;
particleColors[i * 3 + 2] = 1.0;
}
// Update particle color attribute
particleGeometry.attributes.color.setXYZ(i, particleColors[i * 3], particleColors[i * 3 + 1], particleColors[i * 3 + 2]);
}
particleGeometry.attributes.position.needsUpdate = true;
controls.update();
renderer.render(scene, camera);
};
animate();
}
init();
</script>
</body>
</html>

After that, we create a sphere and a particle system. We define the number of particles in the system, set their positions and colors randomly within a sphere-shaped area, and add them to the scene.

Finally, we group the sphere and particle system together and add it to the scene. We also create an animation loop that will update the positions of the particles over time, creating the appearance of a comet moving through the scene.

In conclusion, the comet effect can be easily achieved in Three.js by creating a large number of small particles and animating them to move in a specific direction. The combination of the sphere, particle system, and animation loop creates a visually striking and dynamic effect that can be used to enhance any 3D game or application.


Thursday, January 26, 2023

How to Add a Space Ship Mouse Pivot Function to a 3D Game using Three.js


In a 3D game, creating realistic movement for a space ship can greatly enhance the player's experience. One way to achieve this is by using a pivot object to control the rotation of the space ship.

A pivot object is created by instantiating a new THREE.Object3D() and setting its position to match that of the space ship. The space ship is then added as a child of the pivot object. By using the pivot object, you can control the rotation of the space ship in a more realistic way. For example, you can make the space ship rotate around its own center of mass instead of its origin, which would look more realistic when the ship is accelerating or decelerating.

The onMouseMove function is used to track the change in mouse position and update the targetShipRotationY and targetShipRotationX variables. These variables are then clamped to a specific range using the THREE.Math.clamp() function, this will limit the maximum and minimum rotation of the ship in the y and x axis.


In the render loop, the THREE.Math.lerp() function is used to smoothly interpolate the currentShipRotationY and currentShipRotationX variables from their current values to the target values. The lerpShipValue variable determines the speed of the interpolation, with a value of 0.05 resulting in a slow, smooth rotation.


<!--////////////////////////////////////////////////////////////////////////////////////////
/// ///
/// Example Using Three.js Library, HTML & Javascript ///
// Developer 3D Interactive Games and Apps 2021-2023 ///
/// Contact Shane Brumback https://www.shanebrumback.com ///
/// Send a message if you have questions about this project ///
/// ///
////////////////////////////////////////////////////////////////////////////////////////////-->
<html>
<head>
<title>Three.js Pivot a 3D Game Object with the Mouse</title>
<style>
body {
margin: 0;
}
canvas {
width: 100%;
height: 100%;
}
</style>
</head>
<body>
<script async src="https://unpkg.com/es-module-shims@1.3.6/dist/es-module-shims.js"></script>
<script type="importmap">
{
"imports": {
"three": "../build/three.module.js",
"three/addons/": "./jsm/"
}
}
</script>
<script type="module">
import * as THREE from 'three';
import { OrbitControls } from 'three/addons/controls/OrbitControls.js';
// Set up Three js scene
const scene = new THREE.Scene();
// Set up the camera
const camera = new THREE.PerspectiveCamera(75, window.innerWidth / window.innerHeight, 0.1, 1000);
camera.position.z = 5;
// Set up the renderer
const renderer = new THREE.WebGLRenderer({ antialias: true });
renderer.setClearColor(0x1c2325, 1); // the default,
renderer.setPixelRatio(window.devicePixelRatio);
renderer.setSize(window.innerWidth, window.innerHeight);
renderer.gammaOutput = true;
renderer.gammaFactor = 1.3;
renderer.shadowMap.enabled = false;
renderer.autoClear = false;
document.body.appendChild(renderer.domElement);
//Set up the orbital controls
const controls = new OrbitControls(camera, renderer.domElement);
controls.dampingFactor = 0.1; // Reduce camera damping for smoother movement
//controls.autoRotate = true; // Make the camera rotate sinuously around the spheres
// Create blue cube
const geometry = new THREE.BoxGeometry(3, 3, 3);
const material = new THREE.MeshLambertMaterial({ color: 0x0000ff });
const cube = new THREE.Mesh(geometry, material);
scene.add(cube);
// Create the spotlight with shadows
const spotLight = new THREE.SpotLight(0xffffff);
spotLight.position.set(10, 20, 30);
spotLight.castShadow = true;
scene.add(spotLight);
// Add ambient light
const ambientLight = new THREE.AmbientLight(0xffffff, 0.5);
scene.add(ambientLight);
// Enable shadows on the spheres
scene.traverse(function (node) {
if (node instanceof THREE.Mesh) {
node.castShadow = true;
}
});
// Create a grid to help with visualizing the movement of the ship
var grid = new THREE.GridHelper(100, 40);
grid.position.y = -4;
scene.add(grid);
// Create an empty object to act as a pivot point for the ship
var pivotShip = new THREE.Object3D();
pivotShip.position.set(cube.position.x, cube.position.y, cube.position.z);
scene.add(pivotShip);
// Add the ship object to the pivot point
pivotShip.add(cube);
// Variables to store the target and current rotation values for the ship
var targetShipRotationY = 0;
var targetShipRotationX = 0;
var currentShipRotationY = 0;
var currentShipRotationX = 0;
var lerpShipValue = 0.05;
// Event listener to update the target rotation values based on mouse movement
function onMouseMove(event) {
targetShipRotationY += event.movementX * 0.01;
targetShipRotationX += event.movementY * 0.01;
// Clamp the rotation values to a certain range
targetShipRotationY = THREE.Math.clamp(targetShipRotationY, -0.0872665, 0.0872665);
targetShipRotationX = THREE.Math.clamp(targetShipRotationX, -0.0872665, 0.0872665);
}
document.addEventListener('mousemove', onMouseMove, false);
// Render loop
const render = function () {
requestAnimationFrame(render);
// Update the camera controls
controls.update()
// Linearly interpolate between the current and target rotation values
currentShipRotationY = THREE.Math.lerp(currentShipRotationY, targetShipRotationY, lerpShipValue);
currentShipRotationX = THREE.Math.lerp(currentShipRotationX, targetShipRotationX, lerpShipValue);
// Apply the rotation values to the pivot point
pivotShip.rotation.y = -currentShipRotationY;
pivotShip.rotation.z = -currentShipRotationX;
// Render the scene
renderer.render(scene, camera);
};
render();
</script>
</body>
</html>

By using this technique you can make the movement of the space ship more realistic, as it will rotate around its center of mass when accelerating or decelerating, and the rotation will be smooth and gradual, which will enhance the player's experience and immersion in the game. Additionally, this code snippet can be integrated with other functionalities to make your space ship move, accelerate, fire and collide with other objects in the game. You can also adjust the sensitivity of the ship's rotation by changing the value of the event.movementX and event.movementY properties and adjust the rotation speed by changing the value of lerpShipValue. Overall, using a pivot object to control the rotation of a space ship in a 3D game can greatly enhance the realism and overall gameplay experience for the player.


Wednesday, January 25, 2023

How To Code A Threejs Galaxy Particle System Using HTML and JavaScript


Creating a 3D spinning galaxy using Three.js and galaxy images is a great way to add a visually stunning element to your project. Here are the steps you can follow to create your own spinning galaxy


Start by importing the necessary modules. You will need the Three.js library, as well as any additional modules you want to use, such as the OrbitControls module for camera controls.

  1. Set up your Three.js scene, camera, and renderer. The scene is where all the elements of your galaxy will be placed, the camera is used to view the scene, and the renderer is used to render the scene to the screen.
  2. Create a texture loader and set the cross-origin property to an empty string.
  3. Create a new group object which will hold all the galaxy elements.
  4. Create a new texture using the texture loader and set it to your galaxy image.
  5. Create a new material using the texture you created in step 5, and apply it to the sphere geometry.
  6. Create a new mesh using the sphere geometry and material, and add it to the group object.
  7. Set up the orbital controls for your camera. This will allow you to move and rotate the camera around the galaxy.
  8. Define the animate() function and set it to call the requestAnimationFrame() method. Within this function, rotate the group object on the z-axis and render the scene using the renderer.
  9. Finally, call the animate() function to start the animation and display the 3D spinning galaxy on the screen.


It's important to note that you can customize this code according to your needs, for example you can change the galaxy image by using different images or even videos and you can also change the rotation speed.

With these steps, you should be able to create your own 3D spinning galaxy using Three.js and galaxy images. Good luck!

HTML and JavaScript Example.  This code is all you need to run this particle system.
<!--////////////////////////////////////////////////////////////////////////////////////////
/// ///
/// Example Using Three.js Library, HTML & Javascript ///
// Developer 3D Interactive Games and Apps 2021-2023 ///
/// Contact Shane Brumback https://www.shanebrumback.com ///
/// Send a message if you have questions about this project ///
/// ///
////////////////////////////////////////////////////////////////////////////////////////////-->
<html>
<head>
<title>Three.js Galaxy Particle System Example</title>
<style>
body {
margin: 0;
}
canvas {
width: 100%;
height: 100%;
}
</style>
</head>
<body>
<script async src="https://unpkg.com/es-module-shims@1.3.6/dist/es-module-shims.js"></script>
<script type="importmap">
{
"imports": {
"three": "../build/three.module.js",
"three/addons/": "./jsm/"
}
}
</script>
<script type="module">
import * as THREE from 'three';
import { OrbitControls } from 'three/addons/controls/OrbitControls.js';
// Define global variables
let scene, camera, renderer;
const spheres = [];
// Set up Three js scene
scene = new THREE.Scene();
// Set up the camera
camera = new THREE.PerspectiveCamera(75, window.innerWidth / window.innerHeight, 0.1, 1000);
camera.position.z = 10;
// Set up the renderer
renderer = new THREE.WebGLRenderer({ antialias: true });
renderer.setClearColor(0x1c2325, 1); // the default,
renderer.setPixelRatio(window.devicePixelRatio);
renderer.setSize(window.innerWidth, window.innerHeight);
renderer.gammaOutput = true;
renderer.gammaFactor = 1.3;
renderer.shadowMap.enabled = false;
renderer.autoClear = false;
document.body.appendChild(renderer.domElement);
camera.aspect = window.innerWidth / window.innerHeight;
camera.updateProjectionMatrix();
scene.scale.normalize().multiplyScalar(1);
// Set up the orbital controls
const controls = new OrbitControls(camera, renderer.domElement);
controls.dampingFactor = 0.1; // Reduce camera damping for smoother movement
controls.autoRotate = true; // Make the camera rotate sinuously around the spheres
// Create a grid helper
var grid = new THREE.GridHelper(100, 40);
grid.position.y = -4;
scene.add(grid);
// Create a group to hold all the particles
const galaxyGroup = new THREE.Group()
const particleArrays = [];
createParticles()
// Function to create the particles
function createParticles() {
// Create 5 arrays of particles
for (let i = 0; i < 5; i++) {
const particles = new THREE.BufferGeometry();
const particleMaterial = new THREE.PointsMaterial({
color: 0xffffff,
size: 0.08,
});
const positions = new Float32Array(100 * 3);
for (let j = 0; j < 100; j++) {
// Calculate the angle for the current particle
const angle = j * 0.4 + i * 0.5;
// Calculate the x, y, and z positions of the particle based on the angle
const particleX = (j * 0.1) * Math.cos(angle);
const particleY = (j * 0.1) * Math.sin(angle);
const particleZ = j * 0.01;
// Set the position of the particle
positions[j * 3] = particleX;
positions[j * 3 + 1] = particleY;
positions[j * 3 + 2] = particleZ;
}
// Add the position attribute to the buffer geometry
particles.addAttribute('position', new THREE.BufferAttribute(positions, 3));
const particleSystem = new THREE.Points(particles, particleMaterial);
particleArrays.push(particleSystem);
galaxyGroup.add(particleSystem);
}
scene.add(galaxyGroup);
galaxyGroup.rotation.x = -60 * Math.PI / 180;
galaxyGroup.rotation.y = -45 * Math.PI / 180;
}
function animate() {
requestAnimationFrame(animate);
galaxyGroup.rotateZ(.005)
renderer.render(scene, camera);
}
animate();
</script>
</body>
</html>

The code I provided earlier is an example of how to create a 3D spinning galaxy particle system using Three.js. It is important to note that along with the JavaScript code, you will also need to include the necessary HTML and CSS code to set up the webpage where the galaxy will be displayed.

It's also important to note that this example is just one way to create a 3D spinning galaxy and that you can customize it to create different types of galaxies by changing the galaxy image, adjusting the camera controls, changing the rotation speed, and much more.

You can also use this code as a starting point and build upon it to create more complex and interesting galaxy animations.

In short, the example code demonstrates how to create a 3D spinning galaxy particle system using Three.js and galaxy images, and HTML and javascript code that is necessary to display it on a webpage.


Saturday, January 21, 2023

How to add a Three.js Particle System to a 3D Game Rocket Engine with HTML and Javascrpt


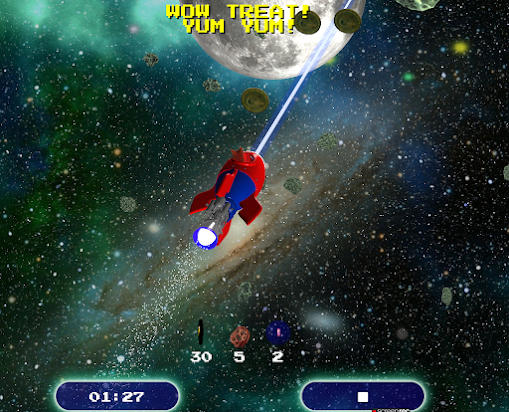
Particle systems are a great way to add special visual effects to your 3D scenes, such as fire, smoke, or sparks. In this article, we will show you how to create a particle system for a rocket engine using the Three.js library.

First, you will need to create a geometry that will store the positions of the particles. This is done using the THREE.BufferGeometry object. Next, you will need to create an array of particle positions and initialize them to the origin (0, 0, 0). This is done using the Float32Array object.


Once you have the positions of the particles, you will need to add them to the buffer geometry using the addAttribute method. After that, you will need to create a material for the particles. This is done using the THREE.PointsMaterial object. The material is what gives the particles their visual appearance.

Next, you will create a particle system using the THREE.Points object. This object is what will be used to render the particle system. Finally, you will add the particle system to the scene using the add method.


Click Image for Game Site


To animate the particle system, you will need to use the requestAnimationFrame function. This function is called repeatedly to update the particle positions and render the scene.

Keep in mind that this is just an overview of the process, and you will need to have some knowledge of Three.js and programming in general to implement it in your own projects.

Introduction

In this tutorial, we will be creating a particle system for a rocket exhaust using Three.js. A particle system is a technique used to simulate a variety of special visual effects like fire, smoke, and sparks.

Step 1: Create the particle geometry

First, we will create a THREE.BufferGeometry object that will be used to store the particle positions.

    
    let particleGeometry = new THREE.BufferGeometry();

Step 2: Create an array of particle positions

We will create an array of particle positions and initialize them to the origin (0, 0, 0).

    
    // Create an array of particle positions
    var particlePositions = new Float32Array(1000 * 3);

    for (var i = 0; i < 1000; i++) {
        // Set the x, y, and z coordinates for the particle
        var x = 0;
        var y = 0;
        var z = 0;
        particlePositions[i * 3 + 0] = x;
        particlePositions[i * 3 + 1] = y;
        particlePositions[i * 3 + 2] = z;
    }

Zombie Attack Demo Game


Step 3: Add the particle positions to the buffer geometry

We will add the particle positions to the buffer geometry using the addAttribute method.

    
    particleGeometry.addAttribute('position', 
             new THREE.BufferAttribute(particlePositions, 3));

Step 4: Create a material for the particles

We will create a THREE.PointsMaterial object that will be used to render the particles.

    
    var particleMaterial = new THREE.PointsMaterial({
        color: 0xffffff,
        size: 0.1
    });

Step 5: Create a particle system

We will create a THREE.Points object that will be used to render the particle system.

    
    var particleSystem = new THREE.Points(particleGeometry, particleMaterial);
   

Step 6: Add the particle system to the scene

We will add the particle system to the scene using the add method.

    
    scene.add(particleSystem);


Step 7: Animate the particle system

We will use the requestAnimationFrame function to animate the particle system.

    
    function animate() {
       
    requestAnimationFrame(animate);
   
    // Get the particle positions from the buffer geometry
    var positions = particleGeometry.attributes.position.array;

    for (var i = 0; i < 1000; i++) {

        // Assign a random speed to the particle
        var speed = Math.random() * 0.5;

        // Move the particle in the -z direction at the random speed
        positions[i * 3 + 2] -= speed;

        //expanding on x and y axis
        positions[i * 3 + 0] += (Math.random() - 0.5) * 0.08;
        positions[i * 3 + 1] += (Math.random() - 0.5) * 0.08;
        // Check if the particle has reached the reset point
        if (positions[i * 3 + 2] < -2) {
            // Reset the particle back to its starting position
            positions[i * 3 + 0] = RocketObject.position.x;
            positions[i * 3 + 1] = RocketObject.position.y;
            positions[i * 3 + 2] = RocketObject.position.z;
        }
    }

    // Update the particle positions in the buffer geometry
    particleGeometry.attributes.position.needsUpdate = true;
        renderer.render(scene, camera);

    }
    
    animate();


Quick Working Webpage Example

<!--////////////////////////////////////////////////////////////////////////////////////////
/// ///
/// Example Using Three.js Library, HTML, CSS & JavaScript ///
// 3D Interactive Web Apps & Games 2021-2024 ///
/// Contact Shane Brumback https://www.shanebrumback.com ///
/// Send a message if you have questions about this code ///
/// I am a freelance developer. I develop any and all web. ///
/// Apps Websites 3D 2D CMS Systems etc. Contact me anytime :) ///
/// ///
////////////////////////////////////////////////////////////////////////////////////////////-->
<!DOCTYPE html>
<html lang="en">
<head>
<meta charset="UTF-8">
<meta name="viewport" content="width=device-width, initial-scale=1.0">
<title>Threejs Examples - Rocket Engine Particle System</title>
<style>
body {
color: white;
text-align: center;
margin: 0;
background-color: black
}
a {
text-decoration: none;
color: white;
}
h1 {
padding: 10px;
}
</style>
</head>
<body>
<a href="http://www.shanebrumback.com/threejs-examples/rocket-engine-particle-system.html">
<h1>Threejs Examples - Rocket Engine Particle System</h1>
</a>
<!--Load the latest version of Three.js from CDN-->
<script src="https://cdn.jsdelivr.net/npm/three@latest/build/three.min.js"></script>
<script src="https://cdn.jsdelivr.net/npm/three@latest/examples/js/controls/OrbitControls.js"></script>
<script type="module">
function init() {
// Define global variables
let scene, camera
const spheres = [];
// Set up Threejs scene
scene = new THREE.Scene();
// Set up the camera
camera = new THREE.PerspectiveCamera(75, window.innerWidth / window.innerHeight, 0.1, 1000);
camera.position.x = 2; // Set the initial x-coordinate of the camera
camera.position.z = 2; // Set the initial z-coordinate of the camera
camera.position.y = 1; // Set the initial y-coordinate of the camera
camera.zoom = 5;
// Set up the renderer and Configure settings
let renderer = new THREE.WebGLRenderer({ antialias: true, alpha: true });
renderer.setPixelRatio(window.devicePixelRatio);
renderer.setSize(window.innerWidth, window.innerHeight);
renderer.toneMapping = THREE.ReinhardToneMapping;
renderer.setClearColor(0x000000); // Set background color to black
renderer.domElement.style.position = 'fixed';
renderer.domElement.style.zIndex = '-1';
renderer.domElement.style.left = '0';
renderer.domElement.style.top = '0';
document.body.appendChild(renderer.domElement);
// Set the aspect ratio of the camera and update the projection matrix
camera.aspect = window.innerWidth / window.innerHeight;
camera.updateProjectionMatrix();
// Scale the scene
scene.scale.normalize().multiplyScalar(1);
// Set up the orbital controls
const controls = new THREE.OrbitControls(camera, renderer.domElement);
controls.dampingFactor = 0.1; // Reduce camera damping for smoother movement
controls.autoRotate = true; // Make the camera rotate sinuously around the spheres
// Create a \ helper
var grid = new THREE.GridHelper(100, 150);
scene.add(grid);
// Create a Vector2 for mouse coordinates
const mouse = new THREE.Vector2();
// Add event listeners for resizing, clicking and moving the mouse
window.addEventListener('resize', onWindowResize, false);
// Function to handle window resize
function onWindowResize() {
camera.aspect = window.innerWidth / window.innerHeight;
camera.updateProjectionMatrix
renderer.setSize(window.innerWidth, window.innerHeight);
}
// Function to handle mouse click
function onMouseClick(event) {
// Set the x and y coordinates of the mouse
mouse.x = (event.clientX / window.innerWidth) * 2 - 1;
mouse.y = - (event.clientY / window.innerHeight) * 2 + 1;
}
// Create a particle geometry for rocket exhaust
let particleGeometry = new THREE.BufferGeometry();
// Create an array of particle positions
var particlePositions = new Float32Array(1000 * 3);
// Loop through and set the initial x, y, and z coordinates for each particle
for (var i = 0; i < 100; i++) {
var x = 0;
var y = 0;
var z = 0;
particlePositions[i * 3 + 0] = x;
particlePositions[i * 3 + 1] = y;
particlePositions[i * 3 + 2] = z;
}
// Add the particle positions to the buffer geometry
particleGeometry.setAttribute('position', new THREE.BufferAttribute(particlePositions, 3));
// Create a material for the particles
var particleMaterial = new THREE.PointsMaterial({
color: 0xffffff,
size: 0.05
});
// Create a particle system from the buffer geometry and material
var particleSystem = new THREE.Points(particleGeometry, particleMaterial);
// Add the particle system to the scene
scene.add(particleSystem);
// Function to animate the rocket exhaust particles
function animateRocketExhaustParticles() {
// Get the particle positions from the buffer geometry
var positions = particleGeometry.attributes.position.array;
// Loop through each particle
for (var i = 0; i < 1000; i++) {
// Assign a random speed to the particle
var speed = Math.random() * 0.5;
// Move the particle in the -z direction at the random speed
positions[i * 3 + 2] -= speed;
//expanding on x and y axis
positions[i * 3 + 0] += (Math.random() - 0.5) * 0.08;
positions[i * 3 + 1] += (Math.random() - 0.5) * 0.08;
// Check if the particle has reached the reset point
if (positions[i * 3 + 2] < -2) {
// Reset the particle back to its starting position
positions[i * 3 + 0] = mouse.x;
positions[i * 3 + 1] = mouse.y;
positions[i * 3 + 2] = 0;
}
}
// Update the particle positions in the buffer geometry
particleGeometry.attributes.position.needsUpdate = true;
}
function animate() {
requestAnimationFrame(animate);
// animate Rocket exhaust particles
animateRocketExhaustParticles()
controls.update()
renderer.render(scene, camera);
}
animate();
}
init()
</script>
</body>
</html>
This code creates a particle system for a rocket engine using Three.js. It starts by defining global variables for the scene, camera, renderer, and spheres. Then it sets up the Three.js scene and camera, and creates a WebGL renderer with antialiasing and sets the size to the window's size. It also sets up orbital controls for the camera and adds event listeners for window resize, mouse click and mouse move. It creates a particle geometry and sets up an array of particle positions and then adds it to the buffer geometry. It then creates a material for the particles, creates a particle system, and adds it to the scene. The animateRocketExhaustParticles function is called to animate the particles to move in the negative Z direction while expanding on the X and Y axis and when they reach a certain distance it resets them to the starting point.


Saturday, January 14, 2023

How Can 3D Games and Apps Help Improve My Website?


Photo by DeepMind on Unsplash 

3D online games and apps can improve a website by making it more engaging, interactive, and interactive. By incorporating 3D elements, a website can provide users with a more immersive and realistic experience, which can help to increase engagement and retention. For example, a website that sells furniture could use 3D web apps to create virtual room planners and configurators, allowing customers to visualize how different furniture pieces would look in their own homes.

In terms of interactivity, 3D web apps can create interactive product demonstrations, virtual tours, and other tools that can help to increase user engagement and conversions. For example, a website that sells cars could use 3D web apps to create interactive virtual test drives, allowing customers to see and experience the car in a more realistic way.


3D web apps can also be used to create interactive data visualizations, which can make it easier for users to understand and interact with complex data. For example, a website that provides financial analysis could use 3D web apps to create interactive charts and graphs, making it easier for users to understand market trends and make better investment decisions.

In terms of customer service, 3D web apps can be used to create virtual customer service tools, which can improve customer service and support. For example, a website that sells appliances could use 3D web apps to create virtual troubleshooters, which can help customers identify and solve problems with their appliances.

Finally, 3D web apps can be used to create interactive product design tools, which can improve product development processes. For example, a website that sells clothing could use 3D web apps to create virtual fitting rooms, allowing customers to try on clothes and see how they look before making a purchase.

In summary, 3D online games and apps can improve a website by making it more engaging, interactive and interactive, which can help to increase user engagement, conversions, and customer service. 3D web apps can be used to create virtual product demonstrations, product configurators, interactive data visualizations, virtual customer service tools, and interactive product design tools, all of which can provide a more engaging, interactive and interactive experience for the users and help to increase user engagement, conversions and customer service.


How to Program a Shotgun Blast Effect Using Threejs in a 3D Game

This code is a part of a 3D zombie attack game and implements a shotgun blast effect using the Three.js library. It was deve...