

First, you will need to create a geometry that will store the positions of the particles. This is done using the THREE.BufferGeometry object. Next, you will need to create an array of particle positions and initialize them to the origin (0, 0, 0). This is done using the Float32Array object.
Next, you will create a particle system using the THREE.Points object. This object is what will be used to render the particle system. Finally, you will add the particle system to the scene using the add method.
To animate the particle system, you will need to use the requestAnimationFrame function. This function is called repeatedly to update the particle positions and render the scene.
Keep in mind that this is just an overview of the process, and you will need to have some knowledge of Three.js and programming in general to implement it in your own projects.
Introduction
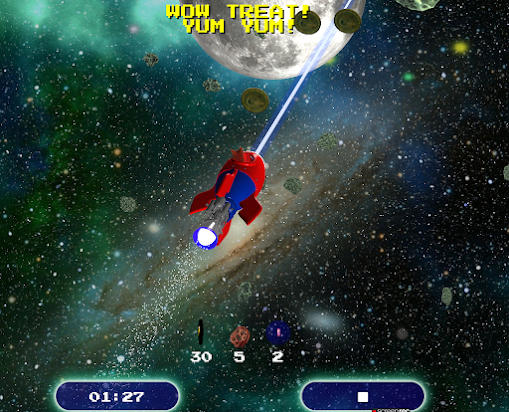
In this tutorial, we will be creating a particle system for a rocket exhaust using Three.js. A particle system is a technique used to simulate a variety of special visual effects like fire, smoke, and sparks.
Step 1: Create the particle geometry
First, we will create a THREE.BufferGeometry object that will be used to store the particle positions.
let particleGeometry = new THREE.BufferGeometry();
Step 2: Create an array of particle positions
We will create an array of particle positions and initialize them to the origin (0, 0, 0).
    // Create an array of particle positions
    var particlePositions = new Float32Array(1000 * 3);

    for (var i = 0; i < 1000; i++) {
        // Set the x, y, and z coordinates for the particle
var x = 0;
var y = 0;
var z = 0;
particlePositions[i * 3 + 0] = x;
particlePositions[i * 3 + 1] = y;
particlePositions[i * 3 + 2] = z;
} Zombie Attack Demo Game
Step 3: Add the particle positions to the buffer geometry
We will add the particle positions to the buffer geometry using the addAttribute method.
particleGeometry.addAttribute('position', new THREE.BufferAttribute(particlePositions, 3));Step 4: Create a material for the particles
We will create a THREE.PointsMaterial object that will be used to render the particles.
    var particleMaterial = new THREE.PointsMaterial({
        color: 0xffffff,
        size: 0.1
    });
Step 5: Create a particle system
We will create a THREE.Points object that will be used to render the particle system.
var particleSystem = new THREE.Points(particleGeometry, particleMaterial); Step 6: Add the particle system to the scene
We will add the particle system to the scene using the add method.
scene.add(particleSystem);
Step 7: Animate the particle system
We will use the requestAnimationFrame function to animate the particle system.
function animate() {
requestAnimationFrame(animate);
// Get the particle positions from the buffer geometry
var positions = particleGeometry.attributes.position.array;
    for (var i = 0; i < 1000; i++) {

        // Assign a random speed to the particle
        var speed = Math.random() * 0.5;

        // Move the particle in the -z direction at the random speed
        positions[i * 3 + 2] -= speed;

        //expanding on x and y axis
        positions[i * 3 + 0] += (Math.random() - 0.5) * 0.08;
        positions[i * 3 + 1] += (Math.random() - 0.5) * 0.08;
        // Check if the particle has reached the reset point
        if (positions[i * 3 + 2] < -2) {
            // Reset the particle back to its starting position
            positions[i * 3 + 0] = RocketObject.position.x;
            positions[i * 3 + 1] = RocketObject.position.y;
            positions[i * 3 + 2] = RocketObject.position.z;
        }
    }

    // Update the particle positions in the buffer geometry
    particleGeometry.attributes.position.needsUpdate = true;
        renderer.render(scene, camera);
}
animate();
Quick Working Webpage Example


No comments:
Post a Comment